
Floor Cushion Tutorial
When I saw Bonnie Christine’s latest fabric release, Her & History, I was in love! I had several projects that immediately popped into my mind, and the first one was a festive but stylish fabric bunting - the tutorial for which is here. My next project was a floor cushion with the gorgeous fern print, which I knew would look perfect in my house and be great for all those playdates where I wind up sitting on the floor (because let’s be honest, it’s hard to get back up).

I made my cushion 24” x 24” because I wanted a very large one, but you can easily adjust these measurements to make any size you’d like. I personally wanted a sturdy, firm pillow, but if you’d like one a bit squishier you can use a less dense and shorter piece of foam or even stuff your floor pillow with stuffing! If you want your tufting to be deeper and more defined, add an extra inch to your fabric pieces to create more room for gathering and bunching.
Supplies Needed
Upholstery foam (I used this one)
Upholstery needle long enough to pierce your foam
1 1/2 yards of fabric
Batting - enough to wrap around your upholstery foam in multiple pieces
Spray Adhesive
Standard size needle and thread
Thick thread - I used DMC cotton pearl thread, but anything thick enough for the upholstery needle will work
Steps
Cut out your top, bottom, and edge fabric pieces using the below diagram. You will have 2 27” squares and 2 53” x 7” rectangles.

2. Sew the two edge strips together on both ends and press the seams. You will have a large circular piece that should fit exactly around your squares!
3. Pin the edge pieces, right sides together, all around the edge of one of your squares. Somehow I missed getting a picture of this, but it’s pretty straightforward! You should see the box shape starting to emerge.
4. Sew along the pinned edges, moving carefully around the corners. Repeat this with the other square, leaving one side of the bottom square unattached and completely open. Back stitch several times at the beginning and end, as you will be putting pressure on these seams when you stuff the cushion.
5. Now, wrap your upholstery foam in batting. You can do this however works best for your batting pieces; either in separately cut out pieces or by wrapping it around the foam. Spray your foam with spray adhesive so the batting doesn’t bunch and shift!
6. Time to stick that foam in your cover! This part can be a little tricky. I’ve found the best way to get the foam into the cover is to move very slowly and carefully, and fold the foam almost in half to get it in the opening. Once you have it in the cover, you can reach inside to adjust and make sure the corners line up right.
7. Now it’s time to pick a movie, tv show, or podcast and settle down with your favorite beverage, because you’re in for some hand stitching! Using your normal needle and thread, use a ladder stitch to close your opening in the cushion cover.
8. Time for tufting! Decide how many tufts you’d like your cushion to have (I did 9, a 3 x 3 grid). Measure out and draw dots with a water soluble or disappearing ink pen where you’d like the tufting to go. It can help to do this on both sides, so you know your needle is coming out in the right places.
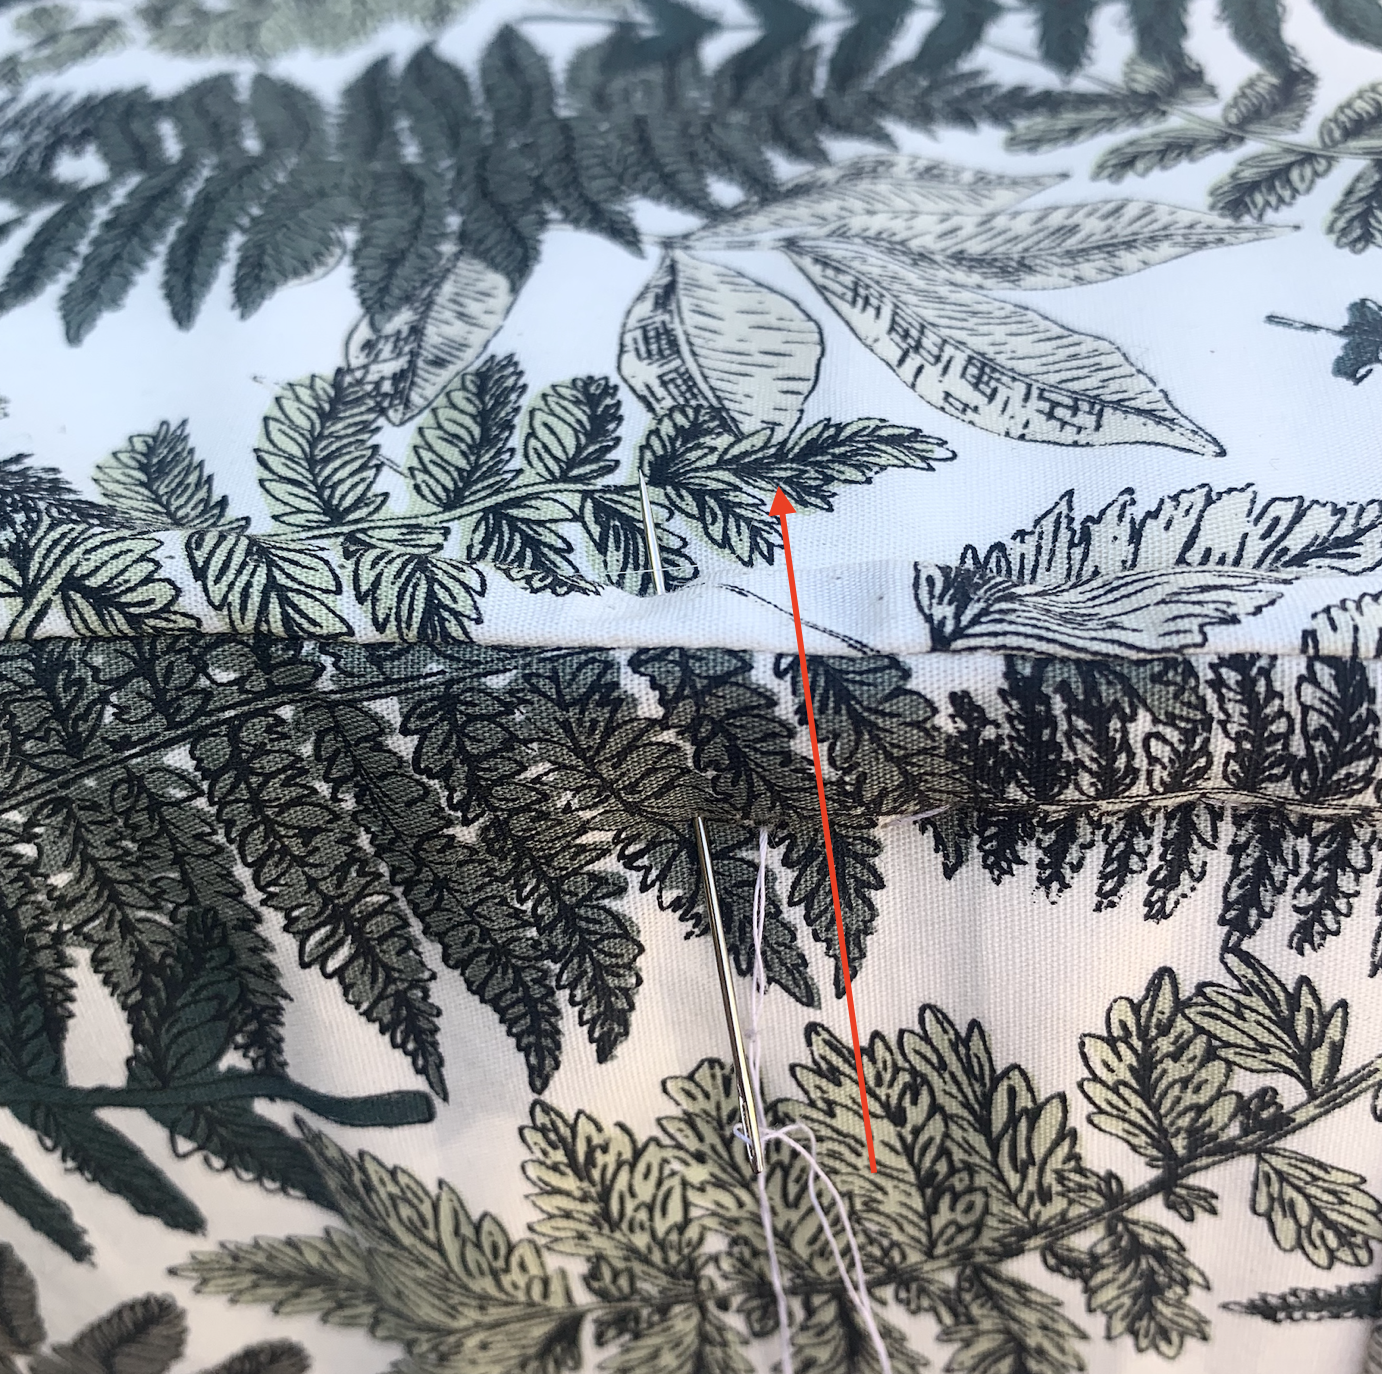
9. Thread your big old upholstery needle with your thick thread and put on a leather thimble if you have one to save your fingers. Push the needle as straight as possible through the cushion at your first dot. Pull the thread through the other side, and do a small (not too small or the fabric may tear) stitch back down into the cushion to come back out the other end.
10. Pull on both ends of the thread and compress the foam until you have tufting depth you like. This can take some trial and error, so don’t be afraid to play with what different depths look like. Once you have a depth you’re happy with, tie the two threads together twice to form a stable knot.
11. This is optional, but I suggest creating another stitch through the same tufted point to make it more secure.
12. Repeat for all of your other tufted points.
13. Now we’ll add the french mattress tufting on the sides, which is way easier than it looks! You’ll want to switch back to your standard needle and thread for this part.
14. Stick your needle into the top of your cushion about 1” from the edge at a 45 degree angle, so it comes out about 1” down the side on the edge. Try to catch the foam into this stitch. Stick your needle back in about 1/4” away from the original stitch, again at a 45 degree angle, so your needle comes back out the top. Pull your thread tight, and you’ll see tufting start to form.

15. Continue this pattern of stitches around all of the edges around the top, pulling your thread tight enough to leave behind tufting. Then repeat for the bottom edge.


Tada! Go sit on your floor cushion and marvel in how much more comfortable it is than the floor!
