Secrets for Perfect Flying Geese
Flying geese are one of the most ubiquitous quilt building blocks out there. I love designing patterns with them - they’re such a great shape! But when it comes to making them, many people struggle (including me!). They seem like they should be straightforward and easy, but have you ever spent hours carefully sewing, pressing, and trimming your flying geese only to find that they’re wonky, lopsided, and undersized? If so, read on because this post is for you.
Construction Methods
First things first: there are three primary ways to make Flying Geese. We’ll go through all of them below, but I’m going to focus on the method that people seem to struggle the most with, and the little tweak I’ve made that has resulted in perfect Flying geese every time.
Method 1: 4 At a Time
Pros: No waste, and you create 4 at a time!
Cons: Many quilters struggle with accuracy. Requires an extremely precise seam allowance. Little room for trimming. Requires cutting 1/8” pieces.
This method often results in slightly too small and wonky geese because you have to have a very, very precise 1/4” seam allowance when making flying geese this way. Guess what? I sure don’t have a perfect seam allowance, and neither do most people I know. I prefer this method for its efficiency, but I’ve always had a hard time when it comes to accuracy.
BUT, by tweaking the math formula a bit, you can make slightly larger geese that still have the right proportions for perfect points.
This modified equation changes the unfinished proportions slightly and gives you more trimming space and room for error around the point of the block, to help make sure you have perfect points every time. When you see a quilt pattern that includes cutting instructions using the traditional equation (the 7/8” or 1/8” measurements are the giveaway), you can substitute the measurements in the Modified Equation Size Chart instead.
If you’d like to show your support for free content and tutorials, you can buy me a coffee!
Here are some of my most popular Flying Geese patterns to practice your FG skills!
Method 2: Stitch and Flip
Pros: Easy and accurate!
Cons: Decent amount of waste, only produces 1 at a time.
Stitch and flip is probably one of the easiest Flying Geese construction methods out there. Plus it’s fun to say (can you say it 10 times fast? I sure can’t!). However, you only get one at a time and produce a lot of waste, so I only personally use it when I’m making less than 4 flying geese. If that’s all you have to make though, this method is a winner!
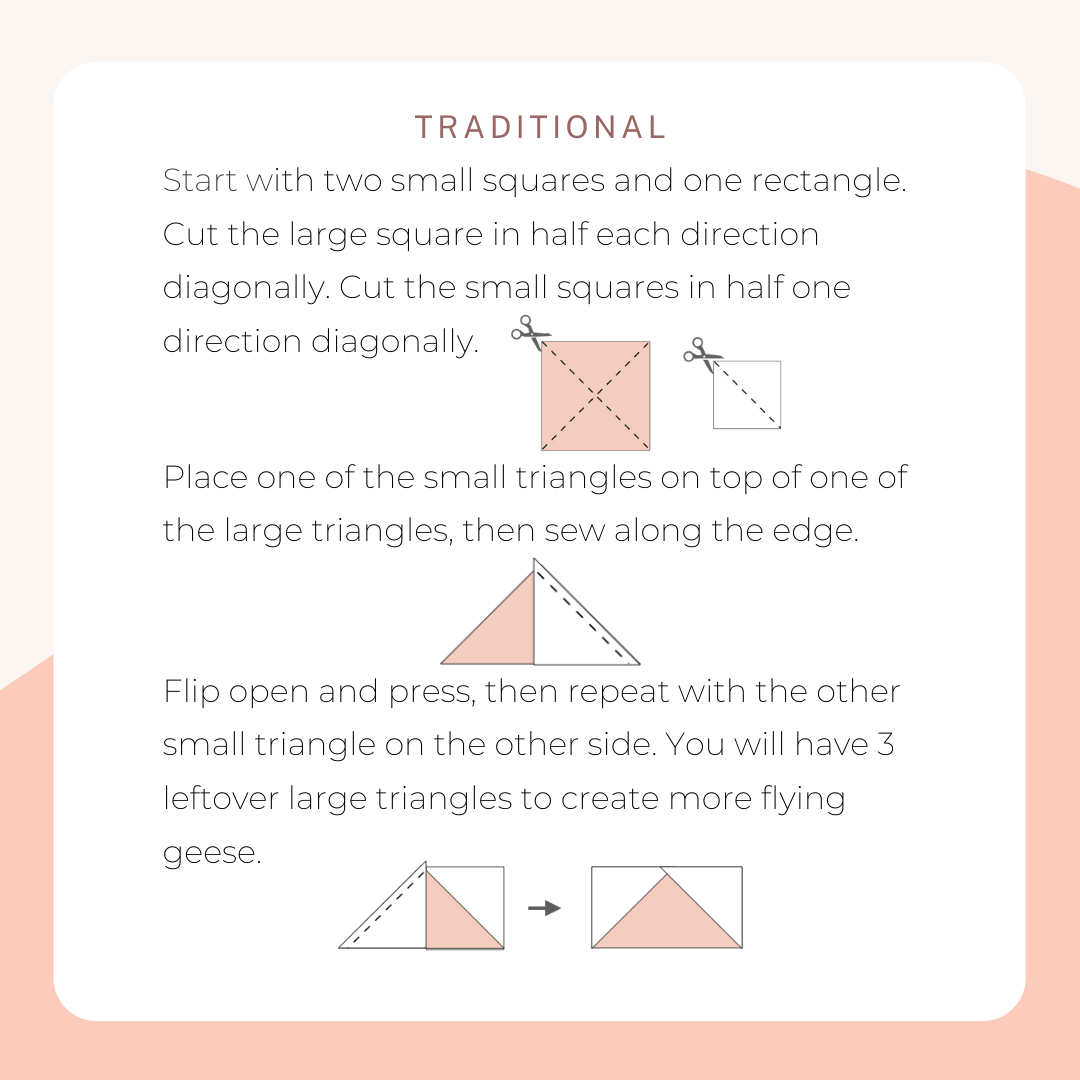
Method 3: Traditional Method
Pros: No waste, accurate!
Cons: Only produces 1 at a time, can be a little more difficult to line things up perfectly
This method is also pretty easy! Because you’ve already cut the lines that you’re sewing against, I find it easier to get a good 1/4” seam. However, I’m not a fan of how labor intensive it sometimes feels, and my geese still sometimes turn out a bit wonky despite my best efforts.
Rulers
Have you ever googled “Flying Geese Rulers” and been totally overwhelmed by the results? I sure have! It helps to divide rulers into two categories: Rulers that help cut the pieces required to make flying geese, and rulers that focus on trimming them. Many of the rulers that are focused on cutting the pieces also use specific or non traditional assembly methods. It’s well worth looking into these (and spoiler alert, a blog post is coming that covers them), but for now we’re going to focus on the rulers that help you perfectly trim the flying geese you’ve made using the methods above
My personal favorite trimming ruler for Flying Geese is the Bloc Loc ruler. This ruler seems spendy, but it has notches where your flying geese seams fit that will save you a ton of time and create some seriously accurate blocks with perfect points. You can buy them individually or as a set - which is what I have, and I’ve never regretted the purchase/
I’ve also heard good things about the Quilt in a Day Flying Geese ruler, though I don’t personally use it because I love those grooves in the bloc loc ruler that keep it from moving!
Bonus Method: FPP on a roll!
I have a confession: I had never heard of Triangles on a Roll before writing this post! I haven’t tried them yet, but they look pretty awesome; basically, you can create an entire long roll of flying geese by using FPP with a preprinted long strip of paper!


