
Introduction To EPP
I’ve always been fascinated but a little afraid of English Paper Piecing. It’s so beautiful, but looks difficult and fiddly! I knew I’d finally have to learn how to do it when I saw some of Laurel’s amazing work. She’s kindly written us a tutorial about getting started! I can’t wait to tackle her bunny pattern soon.

Hi there! Laurel here from Porcupinestew_Threads and I LOVE English Paper piecing (EPP)! I’m here to get you pumped for some hand sewing!
I started to seriously get into EPP about 5 years ago with the beautiful La Passacaglia quilt. As you can see I haven’t finished the quilt! It is quite the long term project!
Lots of EPP patterns are large quilts, but we don’t have to start there! There are lots of smaller more manageable options! This is going to be a great project for sitting on the couch and just binging some Netflix! Or if you’re like me, the American girl podcast will be playing.
English paper piecing is method of attaching stabilized pieces of fabric together, with the fabric stabilized using paper. I prefer to use card stock paper, although you will find plenty of other popular patterns with thinner paper. EPP lets you take complex designs and create them without using a machine and almost always ensures a degree of accuracy albeit a much slower process.
To start our easy EPP project head on over here to grab your FREE Diamond EPP download. Print at 100% scale and if possible print on cardstock.
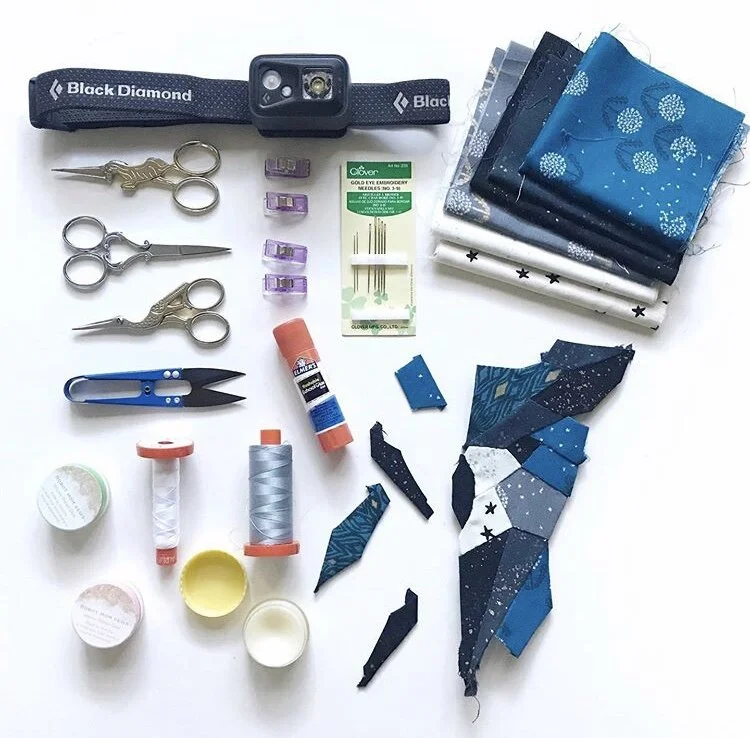
Lets talk about these special EPP tools.
Any pair of snips will work but the small tiny pointed snips help you get a close clean cut on your thread. Plus, they make a great photo prop! The thread I currently use is Aurifil Thread, 50 wt. It is on the more expensive side but I feel that the quality outweighs that. I prefer to use Clover Gold Eye embroidery needles between 8 and 10. The higher the number the smaller the needle eye. I have no clear idea on why I prefer these but I always have them on hand. Thread gloss/ Thread wax is an optional item. It helps conditions your thread and is suppose to keep it from getting tangled. I personally love it, mostly for the scents. Other optional, helpful tools are binding clips, glue stick, and if you need extra light a headlamp is really handy. I often wear mine while we watch tv in bed before sleeping. Something not pictured is a thimble. A thimble will help protect your fingers from the needle. I find it cumbersome and haven’t found one I like or feels natural or even stays on!
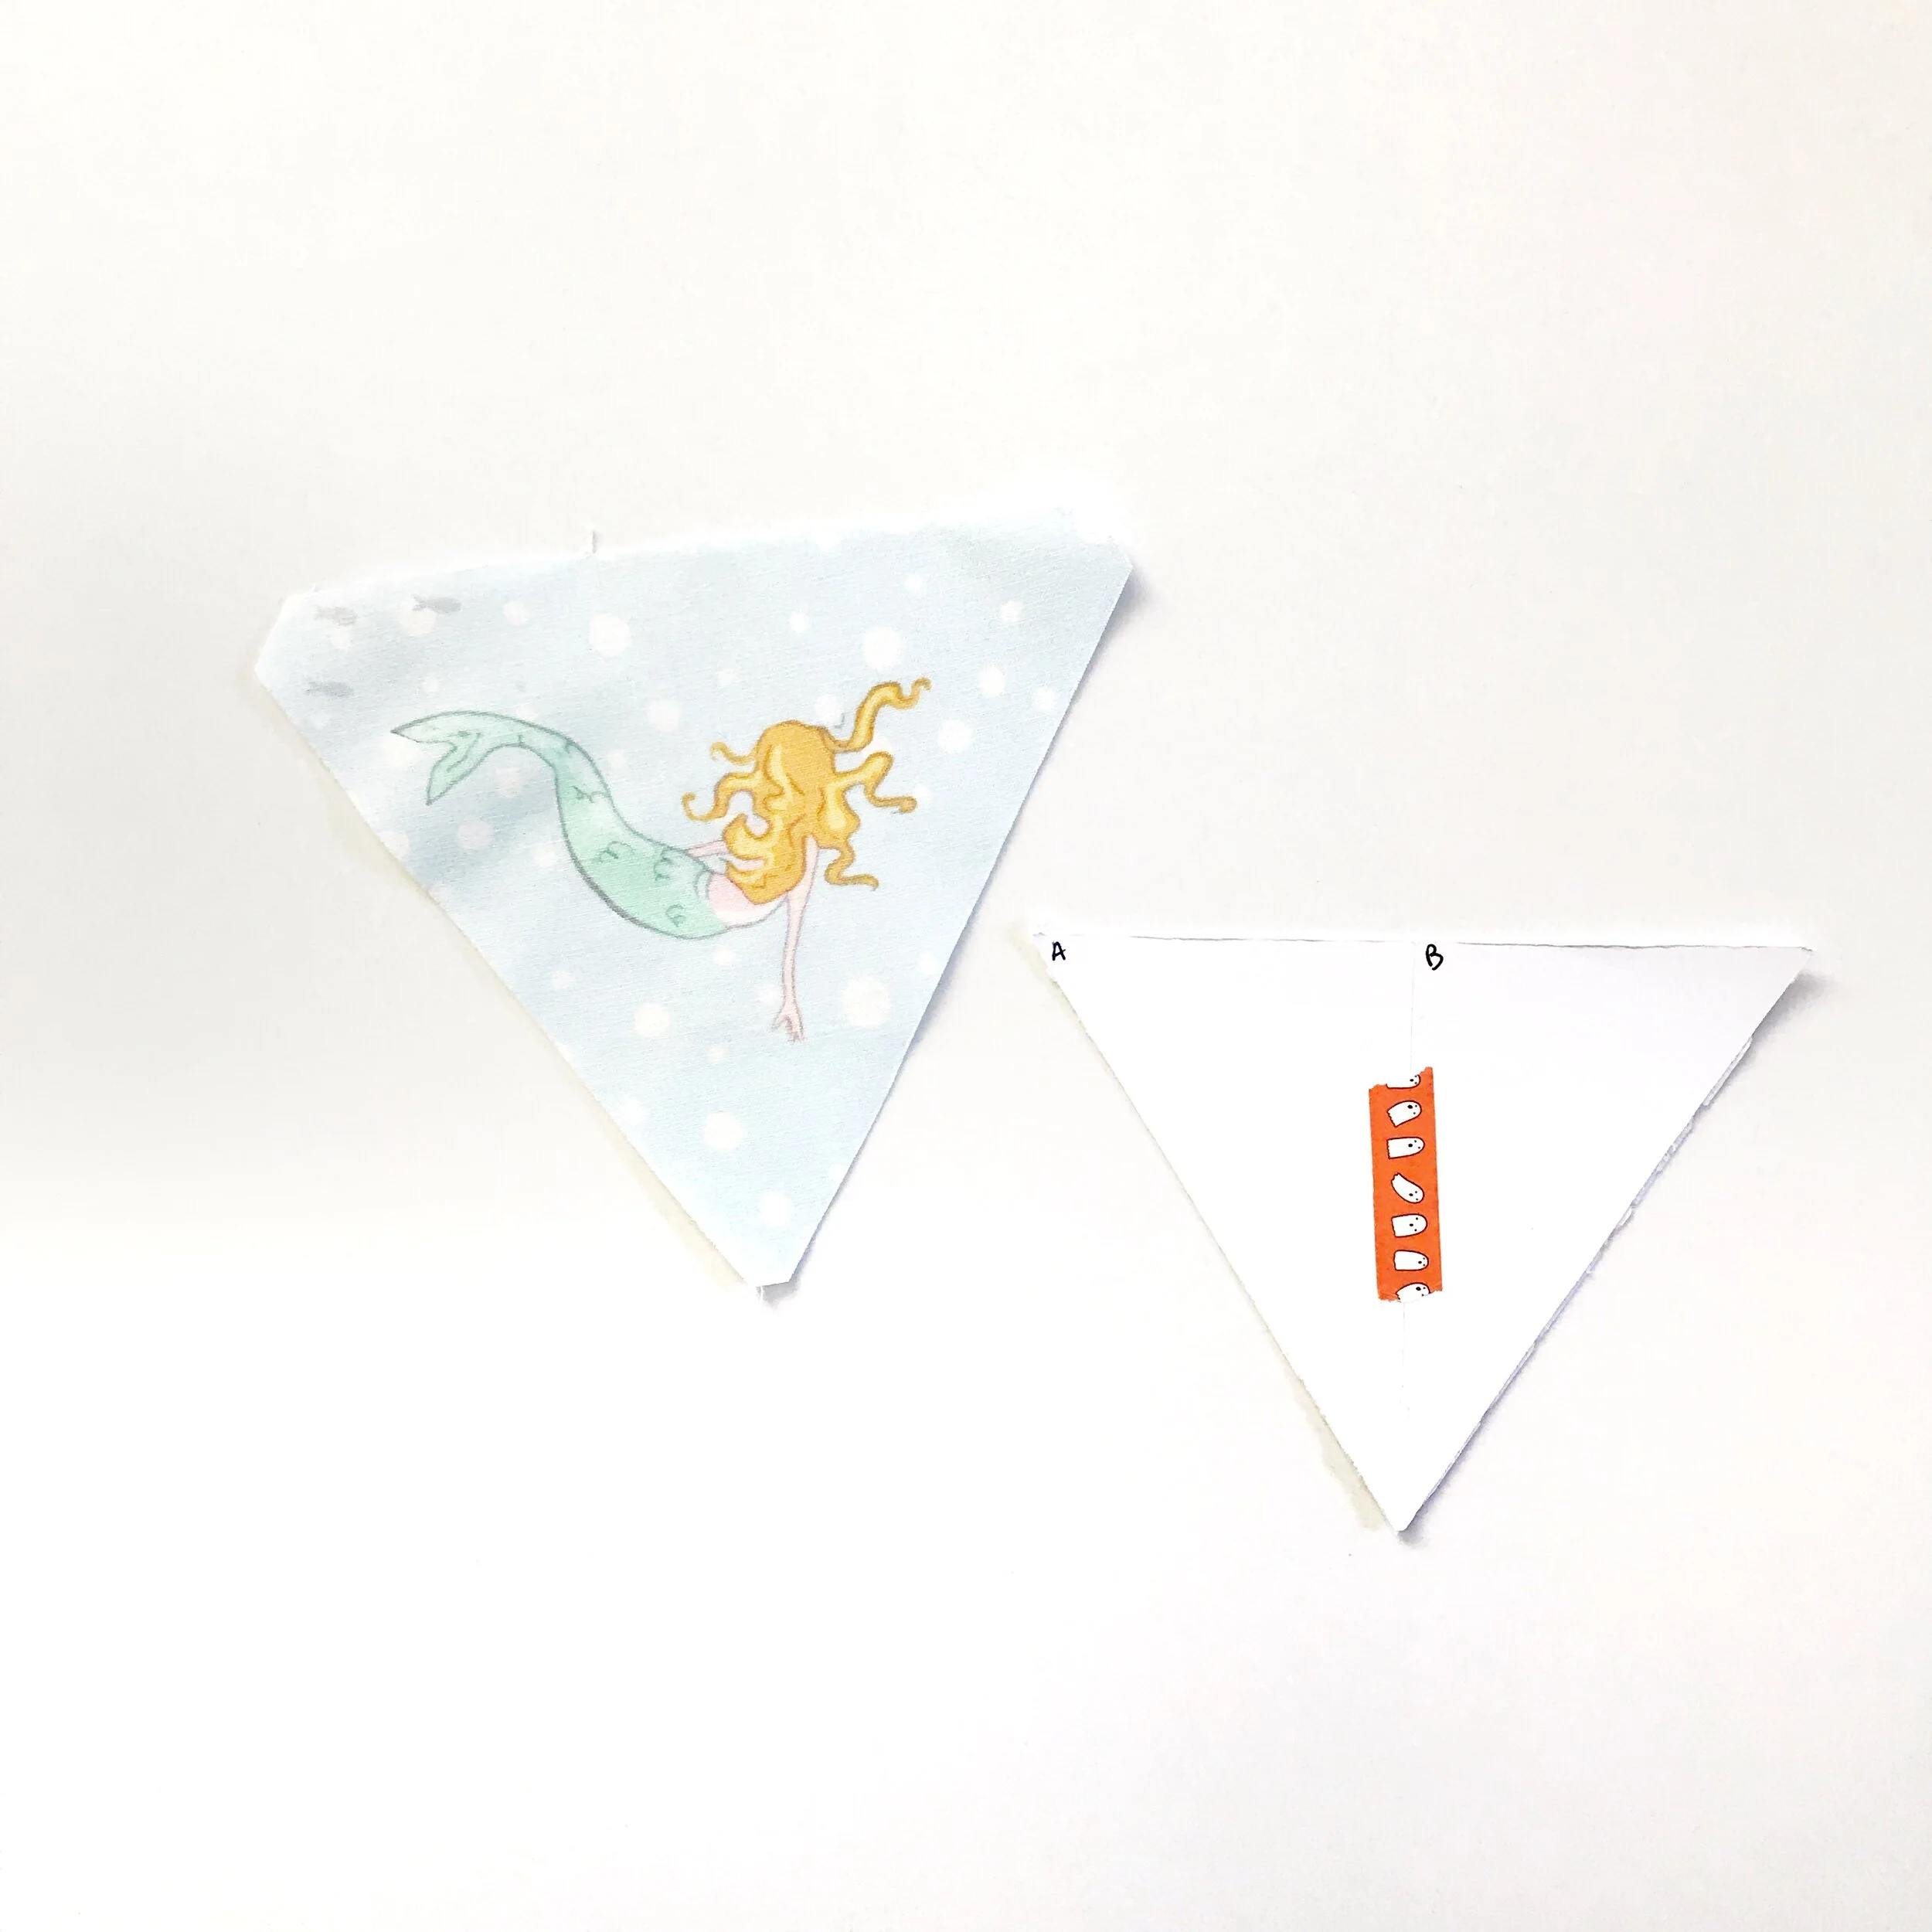
Cut out your paper template pieces with scissors. Punching a hole in the paper pieces now can be helpful when it comes time to removing your paper pieces. Place the paper pieces onto the wrong side of the fabric, with the printed paper side down. Trim the fabric, leaving 1/4’ seam allowance around the paper template.

This is a great time to figure out fussy cutting your pieces! Fussy cutting is trimming around a picture on the fabric, you can create a pretty cool effect with just a few pieces sewn together! I taped the center of the diamond together to allow for more space with fussy cutting.
Next were going to attach our fabric to the paper. This method is called basting. Basting ensures the integrity of the shape and helps the fabric be snug around the paper. To baste your pieces you have two popular methods to pick from. Glue and thread. I prefer to glue baste and that’s the method I will be going over with today. You will want to use a washable glue and one that is in a stick applicator. I use Elmers school glue stick that is purple but dries clear. The purple helps me see where I am applying it. There are other options that have a finer point if the glue stick is too messy. The glue stick is the cheap option and often times you already have it on hand. To baste your pieces, lay your paper piece on top of the wrong side of the fabric. Glue one side and then fold in. Glue another side and fold in. Continue until all sides are glued and folded in. When using glue only use enough glue to hold the fabric in place. Try to remain in the 1/4 seam allowance.

Now we get to move onto the best part! Getting it all to come together! Let’s talk about our stitches, whip stitch or flat back stitch.
When I first started EPP I started off with whip stitch. It’s easy to hold. Easy to sew. Easier to line up pieces. It’s just easy. The downside is that you can usually see the stitches from the front. For some people this brings joy, they like seeing their hard work in those stitches! I am not one of those people, I like my stitches hidden!
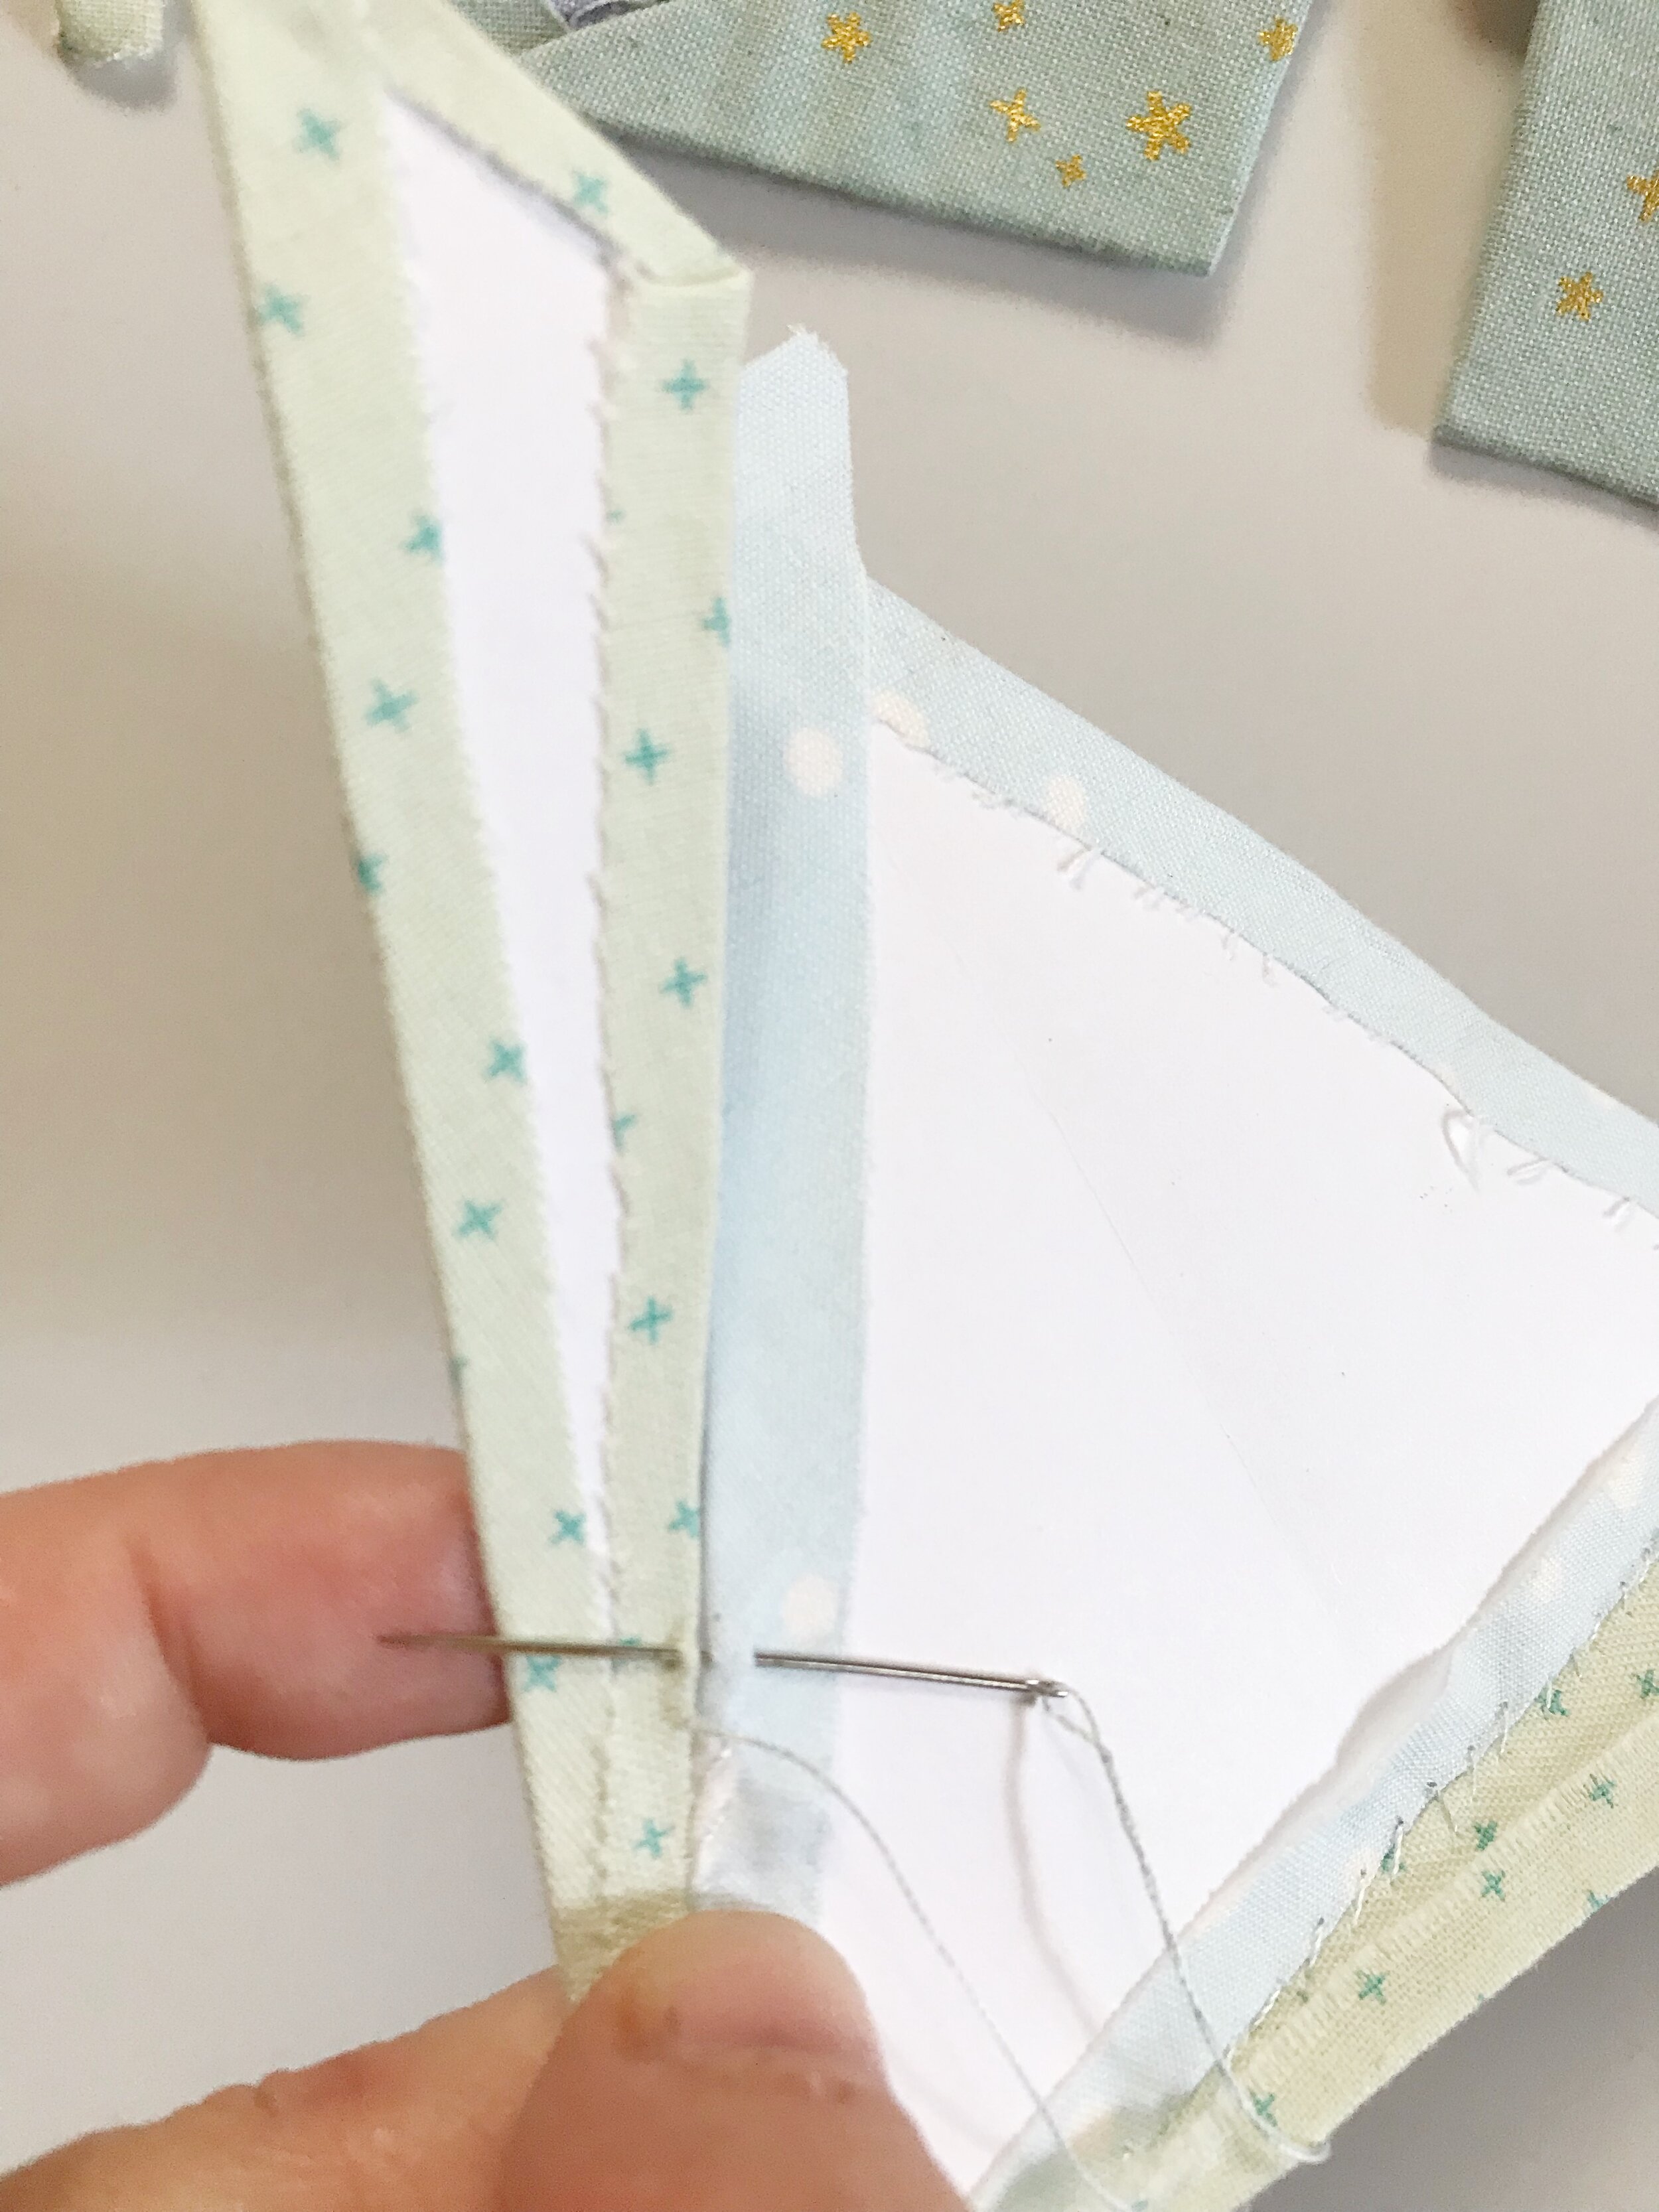
To whip stitch, hold two pieces together with edges lined evenly up. With a knotted thread pull it through the seam allowance, taking care not to sew through the card stock. Catching just a few of the threads on the edges of each fold bring the thread over and around the back through the other piece. Continuing until the next piece. If you find that the piece is too small to handle, those tiny binder clips will come in handy! Careful not to pull too hard, the thread could break!

The flat back stitch is pretty invisible from the front and is what I prefer to use. This means you can use any color thread on hand since it will not be seen from the front. You’ll be laying two pieces flat and stitching them together from the backside. Only grabbing fabric on the back. I tend to hit somewhere between 15-20 stitches per inch.
When all the pieces are together and your diamond has come together it is time to take the papers out. If you glue basted and are having trouble removing the papers, a warm iron should help loosen the glue.
Give your diamond a good press and bam! You just finished your Diamond EPP!

Thank you for stitching along with me!
Check out PSThreads.com for more EPP patterns and kits!

